Showing posts with label Fairies. Show all posts

Tuesday, April 7, 2015

CT Tags featuring "Zarinya" and matching kit "Ladybug Garden"

Today's tags features the fantastical fairy "Zarinya" by Designs by Norella and the matching kit "Ladybug Garden" by Amy Marie.

Zarinya is a cute little ladybug fairy poser perfect for your summer tags. She is PTU and available for purchase at Designs by Norella's store.


The adorable ladybug kit "Ladybug Garden" by Amy Marie is filled with adorable ladybug themed items which matched this poser perfectly.  The kit includes 22 beautiful papers and 132 fun elements.

Below are two tags made using this fun combination.


Saturday, March 28, 2015

CT Tags featuring "Liliana" and "Fairy Spring"

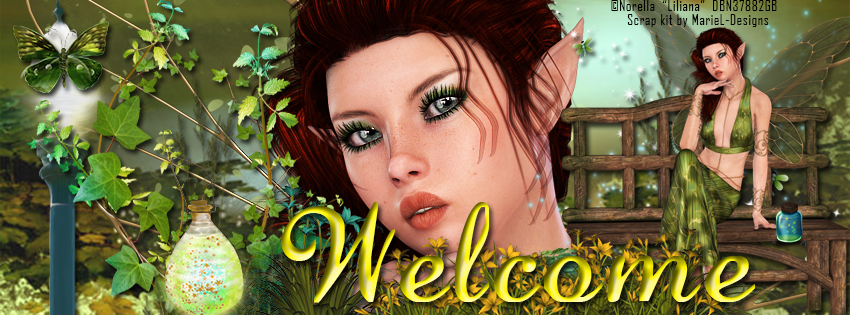
Today's tags feature the beautiful fairy "Liliana" by Designs by Norella and the beautiful made-to-match kit "Fairy Spring" by MarieL-Designs.

Liliana is a gorgeous fairy which is perfect for your spring and summer fantasy tags. This beauty can be used with or without the bench. She is PTU and available for purchase at Designs by Norella's store.


This fantasy spring PTU kit by MarieL-Designs is full of bright fantasy items.  The kit includes 14 papers ranging from full scene backdrops to beautiful complimentary  patterns, 4 fabulous frames, and 75 fantasy elements.  Available at the following stores: Inzpired Creationz, Inspirations of ScrapfriendsBubble's Dream,  Scraps N Company, Render Art World, and Sensibility Scrapping.
Below are two sample tags made using the fabulous combination and a snaggable timeline cover.


Sunday, January 11, 2015

CT Tutorial for "Love Fairy 1" by English Rose Designs

**This tutorial was written using Photoshop CC. I believe the instructions should work with various other versions, but they are not tested on any other version.  This tutorial is my own creation.  Any similarity to any other tutorial is not done purposely or knowingly (aside from the fact that the process is pretty similar in most tutorials).  If you do not know how to do some of the things I mention here (like mirroring an image, adding a drop shadow, resizing elements, etc.), check out my “Tips and Tricks” tutorial. **

Supplies:
PTU Poser – “Love Fairy 1” by English Rose Designs.  You can purchase this elegant beauty at her store, English Rose Designs.

PTU Kit - “Beautiful Love” by Bookworm Dezines

FTU Mask - "Mask 110" by Aqua Rebel.  Available for download on her blog.

Abbreviations:
DS – Drop Shadow

Settings I use:
DS Settings - Blend Mode set to Multiply, Opacity set to 75%, Angle set to 120 degrees, Distance 5, Spread 0, Size 5

Ready…..Set….Tag!
Open Paper 1 in a new canvas.  Double click on the layer to unlock it.

Add the Mask to the canvas and resize if needed so it is the same size as the paper.  Then drag the mask layer below the paper layer.

With the mask layer selected, select all (Ctrl + A) and copy the entire canvas (Ctrl + C).  You will see dashed lines surround the canvas. 

Click on the paper layer to activate it, then turn on quick mask (Press the Q key on your keyboard).  The dashed lines will disappear and that is ok.  Next Paste onto the paper (Ctrl + V) and turn your Quick Mask off (Q again). 

You will now see a dotted outline of the mask on your paper.  Press the button on the bottom of layers side bar that is a rectangle with a circle cut out of it.  The mask will now show. 

Right click on the paper layer and select Convert to Smart Image.  This releases just the mask.  The background layer of the mask will become invisible on its own.

Open a new canvas (Ctrl +N) 700 x 700, transparent background.  This will be referred to as the working canvas in my directions when switching between canvases.

Add Paper 8 to the canvas.  Resize paper to fit entire canvas.

Add the paper/mask combination from above to the working canvas.  Resize to fit the canvas.

Add the full poser to the canvas.  Resize to fit and position on the right side of the canvas.  Add DS. 

Add Element 19 to the canvas.  Resize to fit beside the poser with it slightly overlapping her.  Move the layer below the poser. Add Outer Glow blending option.

Open the poser in another canvas. Use the marquee tool and draw a rectangle around the top half of the poser.  Copy (Ctrl + C) the poser and switch back to the working canvas.  Select the make layer and paste (Ctrl + V) the poser onto the canvas.  Resize the poser to display to your liking and position in the center of the Frame.  Mover the layer below the frame layer.  Right click on the layer and select “create clipping mask”.  This will adhere it to the mask and give it the faded effect.

Add Element 58 to the canvas.  Resize to fit the canvas.  Position at the bottom of the tag so it looks like the poser is walking on the gems.

Add Element 35 to the canvas and resize to fit the width of the canvas.  Position slightly below the heart frame so it slightly overlaps it.  Make sure this layer is above the frame layer.

Voila!  The focal point of your tag is now created.

Now decorate your tag with any of the beautiful elements from the kit.  Resize the elements as you add them so they fit the proportions of your tag.  Experiment with rotating them and mirroring them for more variety.  In addition duplicate elements and use multiple times to fill in holes and add more pizzazz.  In this tutorial to indicate when I used more than one of the same element I will add (X#) by the name to indicate how many versions of the element I used. 

Here are all the additional elements I used from the bottom layers up.
  • Element 60
  • Element 48
  • Element 39 (x2)
  • Element 38
  • Element 47 (x2)
  • Element 46 (x2)

Add your license and copyright info to the tag.

Add name and any other text of choice.

Save as PNG and go share with all your friends!

Thank you for trying my tut! I’d love to see how your tags turn out so if you like what you made, please post a copy here or show me on Facebook!

Saturday, November 29, 2014

CT Tags for Kikina and Legend of the Snow Dragon

Today's tags feature the beautiful fantasy poser "Kikina" by Designs by Norella and the matching kit "Legend of the Snow Dragon" by Mariel Designs.

Kikina is a beautiful winter fairy frolicking with her pet dragon. She is PTU and available for purchase at Designs by Norella's store.


The fabulous made-to-match kit by Mariel Designs is full of wonderful winter fantasy items.  The kit includes 10 gorgeous papers, 4 fabulous frames, and 70 magical elements.
Below are two sample tags made using the fantastic combination.


Saturday, November 8, 2014

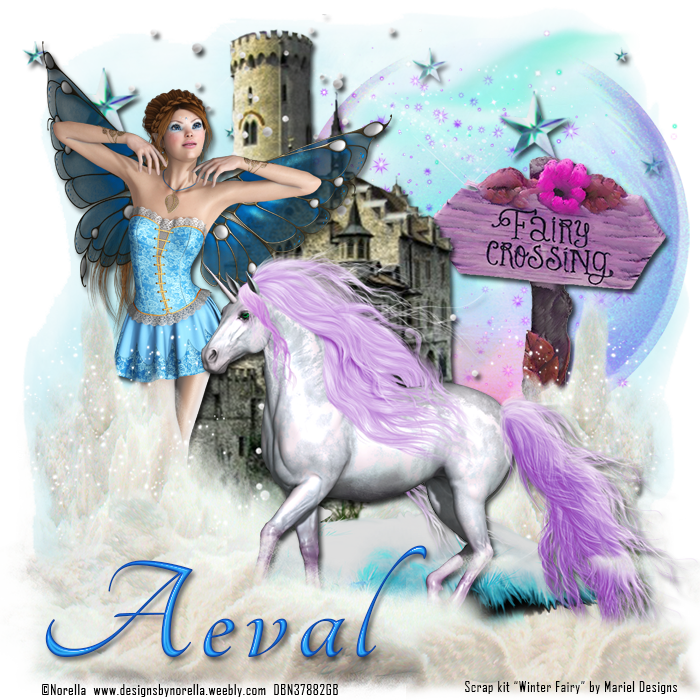
CT Tags for Winter Fairy by Mariel Designs

"Winter Fairy" by Mariel Designs available at Bubble's Dream, Scrappin Dollars,  and Scraps N Company.

This winter fantasy kit comes with 70 Elements, 10 papers, and 6 frames. It is perfect for your magical winter tags.

For my first tag with this autumnal kit I paired it with "Tatiana" by Designs by Norella

For my second tag, I paired it with "Realynn"  by Designs by Norella


Tuesday, October 28, 2014

CT Tags for "Autumn Fantasy" by Mary's Designs

"Autumn Fantasy" by Mary's Designs available at Sensibility Scrapping, Low Budget Scrapping,  Sweet-Pinup and Render Art World.


This fall fantasy kit comes with 73 Elements, 11 papers/backgrounds, 10 frames, and 2 word art. It is perfect for your magical autumn tags.

For my first tag with this autumnal kit I paired it with "Cicely" by Designs by Norella

For my second tag, I paired it with "Autumns Witch"  by Brooke Gillette.


Saturday, October 25, 2014

CT Tags featuring "Giselle" by Designs by Norella

"Giselle" by Designs by Norella available here.


Meet the lovely new fairy "Giselle" by Designs by Norella.
This beautiful fairy comes completes with 3 additional layers 
to change the color palette.


My first tag with this beauty I used "Fairy Princess" by Kizzed by Kelz

For my second tag, I paired her up with "On Dragonfly Wings" by Amy Marie's Kits.

Come check out Giselle and all the other beautiful work at

Monday, October 13, 2014

CT Tutorial for "Blossom" and "Fashion Girl"


**This tutorial was written using Photoshop CC. I believe the instructions should work with various other versions, but they are not tested on any other version.  This tutorial is my own creation.  Any similarity to any other tutorial is not done purposely or knowingly (aside from the fact that the process is pretty similar in most tutorials).  If you do not know how to do some of the things I mention here (like mirroring an image, adding a drop shadow, resizing elements, etc.), check out my “Tips and Tricks” tutorial. **

Supplies:
PTU Poser – “Blossom” by Designs By Norella.  You can purchase the tube at the Designs by Norella store

PTU Kit - “Fashion Girl” by MarieL-Designs.  Available at Scrappin Dollars , Bubble’s Dream, Sweet PinUp, and Scraps & Co.

FTU Mask - "Mask 05 - Dreamscape" by Aeval Amore.  Available for download on my blog, Aeval's Art.

Abbreviations:
DS – Drop Shadow

Settings I use:
DS Settings - Blend Mode set to Multiply, Opacity set to 75%, Angle set to 120 degrees, Distance 5, Spread 0, Size 5

Ready…..Set….Tag!
Open Paper 2 in a new canvas.  Double click on the layer to unlock it.

Add the Mask to the canvas and resize if needed so it is the same size as the paper.  Then drag the mask layer below the paper layer.

With the mask layer selected, select all (Ctrl + A) and copy the entire canvas (Ctrl + C).  You will see dashed lines surround the canvas. 

Click on the paper layer to activate it, then turn on quick mask (Press the Q key on your keyboard).  The dashed lines will disappear and that is ok.  Next Paste onto the paper (Ctrl + V) and turn your Quick Mask off (Q again). 

You will now see a dotted outline of the mask on your paper.  Press the button on the bottom of layers side bar that is a rectangle with a circle cut out of it.  The mask will now show. 

Right click on the paper layer and select Convert to Smart Image.  This releases just the mask.  The background layer of the mask will become invisible on its own.

Open a new canvas (Ctrl +N) 700 x 700, transparent background.  This will be referred to as the working canvas in my directions when switching between canvases.

Add the paper/mask combination from above to the working canvas.  Resize to fit the canvas.   Right click on the layer and select “Blending Options”, Turn on Outer Glow at default settings and click ok.

Add Frame 2 to the canvas.  Resize to fit about ¾ of the canvas and position in the center.  Add DS.

Add Paper 2 to the canvas.  Resize to fit over the opening in the frame.  Move the paper layer below the frame.  Use the eraser tool to erase any overhang of the paper showing outside of the frame.

Open the poser in another canvas. Use the marquee tool and draw a rectangle around the top half of the poser.  Copy (Ctrl + C) the poser and switch back to the working canvas.  Select the frame layer and paste (Ctrl + V) the poser onto the canvas.  Resize the poser to display to your liking and position in the center of the Frame.  Once the poser is displayed to your liking, right click on the poser layer and select “Create Clipping Mask” this will hide any of the poser that is outside of the paper under it.  Right click on the poser layer again and select “Blending Options” change the Blend mode to “Hard Light” and click OK.

Add the full poser to the canvas.  Resize to fit the canvas and position on the right side of the canvas.  Add DS. 

Voila!  The focal point of your tag is now created.

Now decorate your tag with any of the beautiful elements from the kit.  Resize the elements as you add them to fit the proportions of your tag.  Experiment with rotating them and mirroring them for more variety.  In addition duplicate elements and use multiple times to fill in holes and add more pizzazz.  In this tutorial to indicate when I used more than one of the same element I will add (X#) by the name to indicate how many versions of the element I used. 

Here are all the additional elements I used from the bottom layers up.

  • Element 20
  • Element 48 (x2)
  • Element 81
  • Element 16
  • Element 38
  • Element 46
  • Element 10
  • Element 52
  • Element 59
  • Element 33
Add your license and copyright info to the tag.

Add name and any other text of choice.

Save as PNG and go share with all your friends!

Thank you for trying my tut! I’d love to see how your tags turn out so if you like what you made, please post a copy here or show me on Facebook!

Sunday, September 21, 2014

CT Tag Showoff for Mystical Autumn by Ginnibug Designz


PTU Kit is “Mystical Autumn” by Ginnibug Designz.  This magical autumnal themed kit comes with 130 elements (including frames), 2 cluster frames, and 23 papers.  Kit is available for purchase at PicsForDesign:

This kit was made to match the exclusive tube “Autumn Fairy” by Alexhandra Vanhek.  This tube was a pre-paid project, and now can only be purchased as part of the Exclusive Club at PicsForDesign:


CT Tutorial for Mystical Autumn by Ginnibug Designz


**This tutorial was written using Photoshop CC. I believe the instructions should work with various other versions, but they are not tested on any other version.  This tutorial is my own creation.  Any similarity to any other tutorial is not done purposely or knowingly (aside from the fact that the process is pretty similar in most tutorials).  If you do not know how to do some of the things I mention here (like mirroring an image, adding a drop shadow, resizing elements, etc.), check out my “Tips and Tricks” tutorial. **

Supplies:
PTU Tube – “Autumn Fairy” by Alehandra Vanhek. It is an exclusive tube available through the Exclusive Club at PicsForDesign.

PTU Kit - “Mystical Autumn” by Ginnibug Designz.  Made to match the tube and available at PicsForDesign.

FTU Mask - "Mask 12 - Flash" by Aeval Amore.  Available for download on my blog, Aeval's Art.

Abbreviations:
DS – Drop Shadow

Settings I use:
DS Settings - Blend Mode set to Multiply, Opacity set to 75%, Angle set to 120 degrees, Distance 5, Spread 0, Size 5

Ready…..Set….Tag!
Open Paper 12 in a new canvas.  Double click on the layer to unlock it.

Add the Mask to the canvas and resize if needed so it is the same size as the paper.  Then drag the mask layer below the paper layer.

With the mask layer selected, select all (Ctrl + A) and copy the entire canvas (Ctrl + C).  You will see dashed lines surround the canvas. 

Click on the paper layer to activate it, then turn on quick mask (Press the Q key on your keyboard).  The dashed lines will disappear and that is ok.  Next Paste onto the paper (Ctrl + V) and turn your Quick Mask off (Q again). 

You will now see a dotted outline of the mask on your paper.  Press the button on the bottom of layers side bar that is a rectangle with a circle cut out of it.  The mask will now show. 

Right click on the paper layer and select Convert to Smart Image.  This releases just the mask.  The background layer of the mask will become invisible on its own.

Open a new canvas (Ctrl +N) 700 x 700, transparent background.  This will be referred to as the working canvas in my directions when switching between canvases.

Add the paper/mask combination from above to the working canvas.  Resize to fit the canvas.

Add Element 127 to the canvas and resize to fit over the mask.  This adds some sparkle to the background.

Add Element 42to the canvas.  Resize to fit the width of the canvas and position at the top.  Add DS.  Duplicate the layer and move the duplicate layer to the bottom.  This will create an overlay of falling leaves.

Add Element 18 to the canvas.  Resize to fit the canvas and position on the right side.  Add DS.

Add Element 82 to the canvas.  Resize so it is big enough to hold the name you want to put on the tag.  Position in the upper left corner.  Add DS.

Add Element 62 to the canvas.  Resize to fit the width of the canvas.  Position at the bottom of the tag.

Add Element 26 to the canvas.  Resize to your liking and position in front of the grassy area on the left side.

Add the poser to the canvas.  Resize to fit and position her on the right side.  Add DS.

Voila!  The focal point of your tag is now created.

Now decorate your tag with any of the magical autumnal elements from the kit.  Resize the elements as you add them to fit the proportions of your tag.  Experiment with rotating them and mirroring them for more variety.  In addition duplicate elements and use multiple times to fill in holes and add more pizzazz.  In this tutorial to indicate when I used more than one of the same element I will add (X#) by the name to indicate how many versions of the element I used. 

Here are all the additional elements I used from the bottom layers up.

  • Element 114
  • Element 31
  • Element 70
  • Element 81
Add your license and copyright info to the tag.

Add name and any other text of choice.

Save as PNG and go share with all your friends!

Thank you for trying my tut! I’d love to see how your tags turn out so if you like what you made, please post a copy here or show me on Facebook!

Tuesday, September 9, 2014

CT Tutorial for Autumnal Fae and Falls Grace

**This tutorial was written using Photoshop CC. I believe the instructions should work with various other versions, but they are not tested on any other version.  This tutorial is my own creation.  Any similarity to any other tutorial is not done purposely or knowingly (aside from the fact that the process is pretty similar in most tutorials).  If you do not know how to do some of the things I mention here (like mirroring an image, adding a drop shadow, resizing elements, etc.), check out my “Tips and Tricks” tutorial. **

Supplies:
PTU Poser – “Autumnal Fae” by Carolann Creations.  You can purchase the tube at Berry Applicious

PTU Kit - “Falls Grace” by Wicked Princess Scraps.  Available at The PSP Project and Thrifty Scraps.

FTU Mask - "Mask 05 - Dreamscape" by Aeval Amore.  Available for download on my blog, Aeval's Art.


Abbreviations:
DS – Drop Shadow

Settings I use:
DS Settings - Blend Mode set to Multiply, Opacity set to 75%, Angle set to 120 degrees, Distance 5, Spread 0, Size 5

Ready…..Set….Tag!
Open Paper 2 in a new canvas.  Double click on the layer to unlock it.

Add the Mask to the canvas and resize if needed so it is the same size as the paper.  Then drag the mask layer below the paper layer.

With the mask layer selected, select all (Ctrl + A) and copy the entire canvas (Ctrl + C).  You will see dashed lines surround the canvas. 

Click on the paper layer to activate it, then turn on quick mask (Press the Q key on your keyboard).  The dashed lines will disappear and that is ok.  Next Paste onto the paper (Ctrl + V) and turn your Quick Mask off (Q again). 

You will now see a dotted outline of the mask on your paper.  Press the button on the bottom of layers side bar that is a rectangle with a circle cut out of it.  The mask will now show. 

Right click on the paper layer and select Convert to Smart Image.  This releases just the mask.  The background layer of the mask will become invisible on its own.

Open a new canvas (Ctrl +N) 700 x 700, transparent background.  This will be referred to as the working canvas in my directions when switching between canvases.

Add the paper/mask combination from above to the working canvas.  Resize to fit the canvas.

Add LEAFSCATTER to the canvas.  Resize to fit the canvas and position at the bottom of the canvas.  Add DS.

Add BRANCH2 to the canvas. Position it on the right side of the canvas on top of the leaves.  Add DS.

Add LEAF6 to the canvas.  Resize to fill in the space from the upper right corner to where the BRANCH2 element is on the right side.  Add DS.

Add FRAME2 to the canvas.  Resize to fit the entire canvas.  Add DS.

Add BANNER to the canvas.  Resize to fit the width of the canvas and position at the bottom of the canvas. 

Add your poser to the canvas and resize to fit the canvas.  Position her so she looks as though she is kneeling on top of the banner.  Add DS.

Voila!  The focal point of your tag is now created.

Now decorate your tag with any of the fall inspired elements from the kit.  Resize the elements as you add them to fit the proportions of your tag.  Experiment with rotating them and mirroring them for more variety.  In addition duplicate elements and use multiple times to fill in holes and add more pizzazz.  In this tutorial to indicate when I used more than one of the same element I will add (X#) by the name to indicate how many versions of the element I used. 

Here are all the additional elements I used from the bottom layers up.

  • GRASS (X2)
  • CLOUD (X2)
  • BRANCH
  • LEAF1
  • LEAF2
  • OWL
  • SQURILLE
  • LEAF3
  • BUTTERFLY
  • FLOWER2
  • FLOWER3
  • FLOWER5
  • FOX
Add your license and copyright info to the tag.

Add name and any other text of choice.

Save as PNG and go share with all your friends!

Thank you for trying my tut! I’d love to see how your tags turn out so if you like what you made, please post a copy here or show me on Facebook!

Thursday, August 28, 2014

CT Tutorial for Autumn Fairy PTU Poser and PTU Kit

**This tutorial was written using Photoshop CC. I believe the instructions should work with various other versions, but they are not tested on any other version.  This tutorial is my own creation.  Any similarity to any other tutorial is not done purposely or knowingly (aside from the fact that the process is pretty similar in most tutorials).  If you do not know how to do some of the things I mention here (like mirroring an image, adding a drop shadow, resizing elements, etc.), check out my “Tips and Tricks” tutorial. **

Supplies:
PTU Poser – “Autumn Fairy” by Carolann Creations.  You can purchase the tube at Berry Applicious

PTU Kit - “Autumn Fairy” by Ginnibug Designz.  Available exclusively at Scraps N Company.

FTU Mask - "Mask 13 – Cloudy" by Aeval Amore.  Available for download on my blog, Aeval's Art.


Abbreviations:
DS – Drop Shadow

Settings I use:
DS Settings - Blend Mode set to Multiply, Opacity set to 75%, Angle set to 120 degrees, Distance 5, Spread 0, Size 5

Ready…..Set….Tag!
Open Paper 13 in a new canvas.  Double click on the layer to unlock it.

Add the Mask to the canvas and resize if needed so it is the same size as the paper.  Then drag the mask layer below the paper layer.

With the mask layer selected, select all (Ctrl + A) and copy the entire canvas (Ctrl + C).  You will see dashed lines surround the canvas. 

Click on the paper layer to activate it, then turn on quick mask (Press the Q key on your keyboard).  The dashed lines will disappear and that is ok.  Next Paste onto the paper (Ctrl + V) and turn your Quick Mask off (Q again). 

You will now see a dotted outline of the mask on your paper.  Press the button on the bottom of layers side bar that is a rectangle with a circle cut out of it.  The mask will now show. 

Right click on the paper layer and select Convert to Smart Image.  This releases just the mask.  The background layer of the mask will become invisible on its own.

Open a new canvas (Ctrl +N) 700 x 700, transparent background.  This will be referred to as the working canvas in my directions when switching between canvases.

Add the paper/mask combination from above to the working canvas.  Resize to fit the canvas.

Open the poser in another canvas.  Use the marquee tool and draw a rectangle around the face of the poser.  Copy the poser and switch back to the working canvas.  Paste the poser onto the canvas.  Resize to fit in the upper left corner.  Use the Eraser tool to erase around the edges of the face to give it a softer look.  Right click on the on the layer and select Blending Options, change the Blend Mode to “Hard Light” and click OK.

Open another pose of the poser in another canvas.  Use the marquee tool and draw a rectangle around the upper body of the poser.  Copy the poser and switch back to the working canvas.  Paste the poser onto the canvas.  Resize to fit in the upper right corner.  Change the Blend Mode on this one to “Pin Light”.

Add Element 42 to the canvas. Resize to fit the width of the canvas and position at the bottom in front of the mask.  Add DS.

Add Element 30 to the canvas.  Resize to fit the width of the background and position toward the bottom on top of the grass. Add DS.

Add Element 64 to the canvas.  Resize to fit in front of the bridge so it slightly overlaps.  This makes it look like the bridge is between two fields of grass.  Add DS.

Add Element 34 to the canvas.  Resize to your liking and position on the grass in front of the bridge.  Add DS.

Ad your poser who is kneeling to the canvas.  Resize so she fits and look like her forearms are resting on the wheelbarrow.  Add DS.

Voila!  The focal point of your tag is now created.

Now decorate your tag with any of the autumnal elements from the kit.  Resize the elements as you add them to fit the proportions of your tag.  Experiment with rotating them and mirroring them for more variety.  In addition duplicate elements and use multiple times to fill in holes and add more pizzazz.  In this tutorial to indicate when I used more than one of the same element I will add (X#) by the name to indicate how many versions of the element I used. 

Here are all the additional elements I used from the bottom layers up.

  • Element 100
  • Element 49
  • Element 18
  • Element 89 (x2)
  • Element 71 (x2)
  • Element 65
  • Element 97
  • Element 98
  • Element 103
  • Element 104
  • Element 85
  • Element 66
  • Element 40
  • Element 45
  • Element 91
Add your license and copyright info to the tag.

Add name and any other text of choice.

Save as PNG and go share with all your friends!

Thank you for trying my tut! I’d love to see how your tags turn out so if you like what you made, please post a copy here or show me on Facebook!

Sunday, August 10, 2014

CT Tutorial for Golden Fairies and Golden Birdsong

**This tutorial was written using Photoshop CC. I believe the instructions should work with various other versions, but they are not tested on any other version.  This tutorial is my own creation.  Any similarity to any other tutorial is not done purposely or knowingly (aside from the fact that the process is pretty similar in most tutorials).  If you do not know how to do some of the things I mention here (like mirroring an image, adding a drop shadow, resizing elements, etc.), check out my “Tips and Tricks” tutorial. **

Supplies:
PTU Poser – “Golden Fairies” by Carolann Creations.  You can purchase these golden beauties at Berry Applicious.

PTU Kit- “Golden Birdsong” by FwTags Creations.  You can purchase this kit at Berry Applicious Store, Scraps n CompanyMischief Designz, Digi Fox’s Studio,  and Sensibility Scrapping.

FTU Mask – “Mask 11 – Blurry” by Aeval Amore.  You can download the mask on my blog, Aeval’s Art.
Abbreviations:
DS – Drop Shadow

Settings I use:
DS Settings - Blend Mode set to Multiply, Opacity set to 75%, Angle set to 120 degrees, Distance 5, Spread 0, Size 5

Ready…..Set….Tag!
Open Paper 5 in a new canvas.  Double click on the layer to unlock it.

Add the Mask to the canvas and resize if needed so it is the same size as the paper.  Then drag the mask layer below the paper layer.

With the mask layer selected, select all (Ctrl + A) and copy the entire canvas (Ctrl + C).  You will see dashed lines surround the canvas. 

Click on the paper layer to activate it, then turn on quick mask (Press the Q key on your keyboard).  The dashed lines will disappear and that is ok.  Next Paste onto the paper (Ctrl + V) and turn your Quick Mask off (Q again). 

You will now see a dotted outline of the mask on your paper.  Press the button on the bottom of layers side bar that is a rectangle with a circle cut out of it.  The mask will now show. 

Right click on the paper layer and select Convert to Smart Image.  This releases just the mask.  The background layer of the mask will become invisible on its own.

Open a new canvas (Ctrl +N) 700 x 700, transparent background.  This will be referred to as the working canvas in my directions when switching between canvases.

Add the paper/mask combination from above to the working canvas.  Resize to fit the canvas.

Add Element 44 to the canvas.  Resize to fit most of the canvas.  Add DS.  Position toward the left side of the canvas.

Add Element 57 to the canvas.  Resize to fit the base of the gazebo.  Position so it overlaps the bottom of the gazebo.  Add DS.

Add Element 45 to the canvas.  Position the grass in front of the gazebo so that the bottom portion is slightly below the grass.  Add DS.

Add Element 61 to the canvas.  Resize so it is big enough to hold the name you want to include on the tag and position in the middle of the canvas at the bottom. 

Add Element 26 to the canvas.  Resize so that it is the same height roughly as the board.  Position at the left end of the board slightly overlapping it.  Duplicate the element and move the duplicate to the right side of the board.

Add the full size poser to the canvas.  Resize her so she fits on the canvas.  Add DS.  Position her on the right side of the canvas so she looks as though she is flying above the grass.

Voila!  The focal point of your tag is now created.

Now decorate your tag with any of the beautiful elements from the kit.  Resize the elements as you add them so fit the proportions of your tag.  Experiment with rotating them and mirroring them for more variety.  In addition duplicate elements and use multiple times to fill in holes and add more pizzazz.  Fill in any areas of the canvas that you don’t like the way the pieces go together. In this tutorial to indicate when I used more than one of the same element I will add (X#) by the name to indicate how many versions of the element I used. 

Here are all the additional elements I used from the bottom layers up.
  • Element 45
  • Element 67
  • Element 33
  • Element 41
  • Element 13
  • Element 37 (x2)
  • Element 42
  • Element 43
  • Element 34 (x4)
  • Element 24
  • Element 25
  • Element 33 (x2)
  • Element 14
  • Element 4
Add your license and copyright info to the tag.

Add name and any other text of choice.

Save as PNG file.

Thank you for trying my tut! I’d love to see how your tags turn out so if you like what you made, please post a copy here or show me on Facebook!