Showing posts with label Winter. Show all posts

Sunday, December 21, 2014

CT Tags featuring "Alanna" and matching kit "Wonderful Christmas"

Today's tags feature the beautiful Christmas poser "Alanna" by Designs by Norella and the matching kit "Wonderful Christmas" by Mariel Designs.

Alanna is a sassy Christmas present poser. She is PTU and available for purchase at Designs by Norella's store.


The beautiful made-to-match kit by Mariel Designs is full of wonderful Christmas items.  The kit includes 15 gorgeous papers, 7 fabulous frames, and 90 christmasy elements.

Below are two sample tags made using the fabulous combination.


Sunday, December 7, 2014

CT Tags for Clarice and North Pole

Today's tags feature the whimsical Christmas poser "Clarice" by Designs by Norella and the matching kit "North Pole" by Mariel Designs.

Clarice is a fun Christmas helper complete with a red nose and reindeer antlers. She is PTU and available for purchase at Designs by Norella's store.


The whimsical made-to-match kit by Mariel Designs is full of wonderful winter fantasy items.  The kit includes 10 gorgeous papers, 5 fabulous frames, and 70 christmasy elements.

Below are two sample tags made using the fun combination.


Sunday, November 30, 2014

CT Tags for Tubes 4 Taggers - Featuring "Winter Dreams" by Dance in the Rain

"Winter Dreams" by Dance in the Rain available at Tubes 4 Taggers.


This beautiful winter kit features 113 Elements, 24 Papers, and 10 Clusters. Lots of variety available in how to match up the elements of the kit.  Kit is in various shades of blue and white.

For my first tag with this beautiful kit I paired it with "Rose" by Di Halim


For my second tag, I paired it with "Skates"  by Alehandra Vanhek.


Saturday, November 29, 2014

CT Tags for Kikina and Legend of the Snow Dragon

Today's tags feature the beautiful fantasy poser "Kikina" by Designs by Norella and the matching kit "Legend of the Snow Dragon" by Mariel Designs.

Kikina is a beautiful winter fairy frolicking with her pet dragon. She is PTU and available for purchase at Designs by Norella's store.


The fabulous made-to-match kit by Mariel Designs is full of wonderful winter fantasy items.  The kit includes 10 gorgeous papers, 4 fabulous frames, and 70 magical elements.
Below are two sample tags made using the fantastic combination.


Thursday, November 27, 2014

CT Tutorial featuring "Ranger Quinn" by English Rose Designs


**This tutorial was written using Photoshop CC. I believe the instructions should work with various other versions, but they are not tested on any other version.  This tutorial is my own creation.  Any similarity to any other tutorial is not done purposely or knowingly (aside from the fact that the process is pretty similar in most tutorials).  If you do not know how to do some of the things I mention here (like mirroring an image, adding a drop shadow, resizing elements, etc.), check out my “Tips and Tricks” tutorial. **

Supplies:
PTU Poser – “Ranger Quinn” by English Rose Designs.  You can purchase this elegant beauty at her store, English Rose Designs.

PTU Kit - “Softly Falls the Snow” by Graphics of Fantasy Designs.  You can purchase this elegant winter kit at PicsForDesign.com.

FTU Mask - "Mask 05 - Dreamscape" by Aeval Amore.  Available for download on my blog, Aeval's Art.

Abbreviations:
DS – Drop Shadow

Settings I use:
DS Settings - Blend Mode set to Multiply, Opacity set to 75%, Angle set to 120 degrees, Distance 5, Spread 0, Size 5

Ready…..Set….Tag!
Open Paper 5 in a new canvas.  Double click on the layer to unlock it.

Add the Mask to the canvas and resize if needed so it is the same size as the paper.  Then drag the mask layer below the paper layer.

With the mask layer selected, select all (Ctrl + A) and copy the entire canvas (Ctrl + C).  You will see dashed lines surround the canvas. 

Click on the paper layer to activate it, then turn on quick mask (Press the Q key on your keyboard).  The dashed lines will disappear and that is ok.  Next Paste onto the paper (Ctrl + V) and turn your Quick Mask off (Q again). 

You will now see a dotted outline of the mask on your paper.  Press the button on the bottom of layers side bar that is a rectangle with a circle cut out of it.  The mask will now show. 

Right click on the paper layer and select Convert to Smart Image.  This releases just the mask.  The background layer of the mask will become invisible on its own.

Open a new canvas (Ctrl +N) 700 x 700, transparent background.  This will be referred to as the working canvas in my directions when switching between canvases.

Add the paper/mask combination from above to the working canvas.  Resize to fit the canvas.

Add Element 53 to the canvas.  Resize to fit the width of the canvas and position at the bottom.  Add DS.

Add Element 4 to the canvas.  Resize to about ¾ the size of the canvas.  Move this layer under the Element 53 layer and position so part of the church is visible behind the trees.

Select the Element 53 layer to make it the active layer.  Then add Element 50 to the canvas and resize to fit the width of the canvas.  Position at the bottom of the canvas overlapping the hill.  Add DS.

Add Element 31 to the canvas.  Resize to your liking and position on the left side on the canvas.  Position the deer so it looks as though it is stepping onto the snow covered wood.  Add DS.

Add the full poser to the canvas.  Resize to fit and position on the left side of the canvas in front of the back half of the deer.  Add DS. 

Voila!  The focal point of your tag is now created.

Now decorate your tag with any of the winter elements from the kit.  Resize the elements as you add them so they fit the proportions of your tag.  Experiment with rotating them and mirroring them for more variety.  In addition duplicate elements and use multiple times to fill in holes and add more pizzazz.  In this tutorial to indicate when I used more than one of the same element I will add (X#) by the name to indicate how many versions of the element I used. 

Here are all the additional elements I used from the bottom layers up.
  • Element 101
  • Element 77
  • Element 67
  • Element 110
  • Element 39
  • Element 33
  • Element 1
  • Element 40
  • Element 107
  • Element 28

Add your license and copyright info to the tag.

Add name and any other text of choice.

Save as PNG and go share with all your friends!


Thank you for trying my tut! I’d love to see how your tags turn out so if you like what you made, please post a copy here or show me on Facebook!

Friday, November 21, 2014

CT Tags for Tubes 4 Taggers - Featuring "Let It Snow" by KissingKate

"Let It Snow" by Kissing Kate available at Tubes 4 Taggers.


This kit was created to match the Snow Maiden tube by Kajenna available at PicsForDesign, but can be matched with any tube.

This beautiful red and white winter kit features 86 Elements, 10 Papers, and 3 Frames. Lots of variety available in how to match up the elements of the kit.

For my first tag with this jolly kit I paired it with "Katrina" by Designs by Norella


For my second tag, I paired it with "Miss Snowflake"  by Misticheskaya.


Saturday, November 8, 2014

CT Tags for "Tatiana" by Designs by Norella

"Tatiana" by Designs by Norella available here.
 Don't miss this PTU whimsical winter lovely!
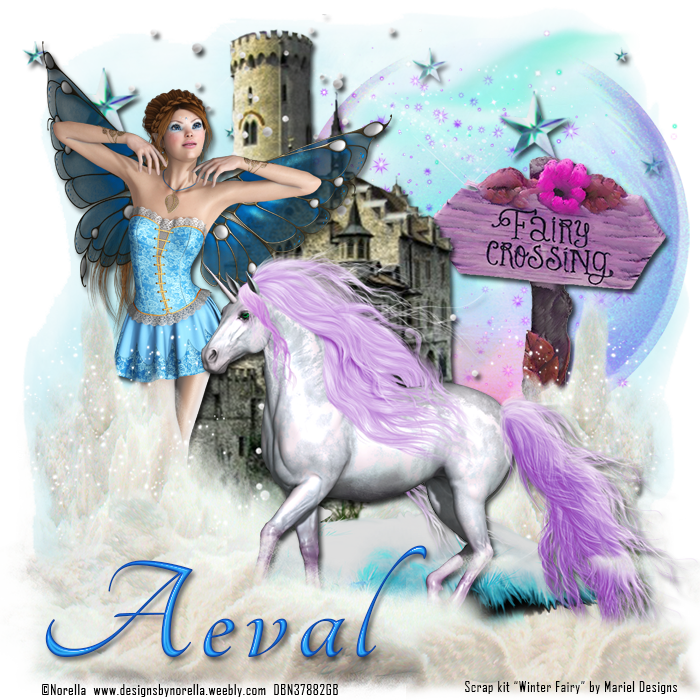
For my first tag I paired Tatiana with PTU Kit "Winter Fairy" by Mariel Designs
For my second tag, I paired her up with FTU Kit "Winter Wonderland" by Digicats (& Dogs).
Come check out Tatiana and all the other beautiful work at


CT Tags for Winter Fairy by Mariel Designs

"Winter Fairy" by Mariel Designs available at Bubble's Dream, Scrappin Dollars,  and Scraps N Company.

This winter fantasy kit comes with 70 Elements, 10 papers, and 6 frames. It is perfect for your magical winter tags.

For my first tag with this autumnal kit I paired it with "Tatiana" by Designs by Norella

For my second tag, I paired it with "Realynn"  by Designs by Norella