Showing posts with label Freebie. Show all posts

Saturday, March 28, 2015

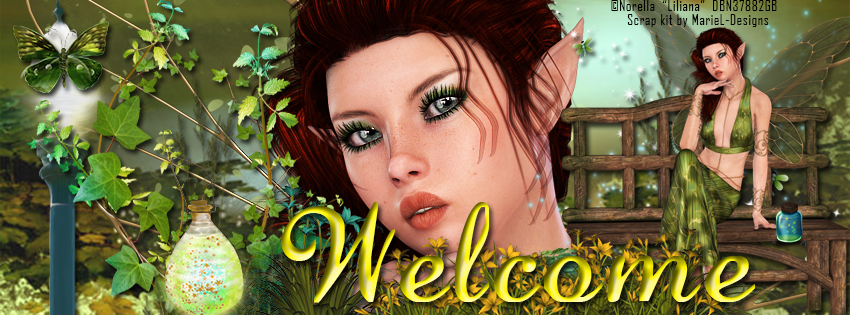
CT Tags featuring "Liliana" and "Fairy Spring"

Today's tags feature the beautiful fairy "Liliana" by Designs by Norella and the beautiful made-to-match kit "Fairy Spring" by MarieL-Designs.

Liliana is a gorgeous fairy which is perfect for your spring and summer fantasy tags. This beauty can be used with or without the bench. She is PTU and available for purchase at Designs by Norella's store.


This fantasy spring PTU kit by MarieL-Designs is full of bright fantasy items.  The kit includes 14 papers ranging from full scene backdrops to beautiful complimentary  patterns, 4 fabulous frames, and 75 fantasy elements.  Available at the following stores: Inzpired Creationz, Inspirations of Scrapfriends, Bubble's Dream,  Scraps N Company, Render Art World, and Sensibility Scrapping.
Below are two sample tags made using the fabulous combination and a snaggable timeline cover.


Wednesday, October 15, 2014

CT Tutorial for Nightborne and The Soul Keeper plus Bonus FB Cover

**This tutorial was written using Photoshop CC. I believe the instructions should work with various other versions, but they are not tested on any other version.  This tutorial is my own creation.  Any similarity to any other tutorial is not done purposely or knowingly (aside from the fact that the process is pretty similar in most tutorials).  If you do not know how to do some of the things I mention here (like mirroring an image, adding a drop shadow, resizing elements, etc.), check out my “Tips and Tricks” tutorial. **

Supplies:
PTU Poser – “Nightborne” by English Rose Designs.  You can purchase this Halloween cutie at her store, English Rose Designs.

PTU Kit - “The Soul Keeper” by MarieL-Designs.  Available at Scrappin Dollars ,  and Scraps & Co.

FTU Mask - "Mask 06 – Fireball” by Aeval Amore.  Available on my blog, Aeval’s Art.

Abbreviations:
DS – Drop Shadow

Settings I use:
DS Settings - Blend Mode set to Multiply, Opacity set to 75%, Angle set to 120 degrees, Distance 5, Spread 0, Size 5

Ready…..Set….Tag!
Open Paper 6 in a new canvas.  Double click on the layer to unlock it.

Add the Mask to the canvas and resize if needed so it is the same size as the paper.  Then drag the mask layer below the paper layer.

With the mask layer selected, select all (Ctrl + A) and copy the entire canvas (Ctrl + C).  You will see dashed lines surround the canvas. 

Click on the paper layer to activate it, then turn on quick mask (Press the Q key on your keyboard).  The dashed lines will disappear and that is ok.  Next Paste onto the paper (Ctrl + V) and turn your Quick Mask off (Q again). 

You will now see a dotted outline of the mask on your paper.  Press the button on the bottom of layers side bar that is a rectangle with a circle cut out of it.  The mask will now show. 

Right click on the paper layer and select Convert to Smart Image.  This releases just the mask.  The background layer of the mask will become invisible on its own.

Open a new canvas (Ctrl +N) 700 x 700, transparent background.  This will be referred to as the working canvas in my directions when switching between canvases.

Add the paper/mask combination from above to the working canvas.  Resize so that the width is a little more than half the width of the canvas.   Position on the right hand side at the top.  Right click on the layer and select “Duplicate Layer” and click OK.  Move the duplicated layer to the left side of the canvas.  The two masks should overlap.

Add Element 68 to the canvas.  Resize to fit the width of the canvas and position at the top of the tag.  Duplicate this layer as well.  Using the Menu Bar select Edit > Transform > Flip Horizontal to flip the element horizontally.  This will create a bit more coverage at the bottom of the tag.

Add Element 20 to the canvas.  Resize to your liking and position on the left hand side above the road.  The element should fill the area from the road to the top of the canvas on the left side.  Add DS.

Add Element 55 to the canvas.  Resize to fit the width of the canvas.  Position in front of the previous element so the moon shows above the scary house.  Add DS.

Add Element 62 to the canvas.  Resize to fit the width of the canvas.  Position in the center of the canvas.  Change the Opacity of the layer to 81%.  Duplicate the layer and move the duplicated layer above the original one to fill in the gap at the top.  The two layers will overlap.

Add Element 58 to the canvas.  Resize to fit the width of the canvas.  Position on the road in front of everything else.  Leave about ¼ of the canvas showing at the bottom as a floor.  Add DS.

Add the full poser to the canvas.  Resize to fit the canvas and position on the left side of the canvas.  Add DS. 

Voila!  The focal point of your tag is now created.

Now decorate your tag with any of the dark elements from the kit.  Resize the elements as you add them to fit the proportions of your tag.  Experiment with rotating them and mirroring them for more variety.  In addition duplicate elements and use multiple times to fill in holes and add more pizzazz.  In this tutorial to indicate when I used more than one of the same element I will add (X#) by the name to indicate how many versions of the element I used. 

Here are all the additional elements I used from the bottom layers up.

  • Element 66
  • Element 67
  • Element 74
  • Element 99
  • Element 21
  • Element 32
  • Element 1
  • Element 3
  • Element 13
  • Element 16
Add your license and copyright info to the tag.

Add name and any other text of choice.

Save as PNG and go share with all your friends!

Thank you for trying my tut! I’d love to see how your tags turn out so if you like what you made, please post a copy here or show me on Facebook!


Wednesday, October 8, 2014

Mask 18 - Kisses


My newest mask filled with lipstick kisses!  I used a kiss brush to make this one for a a new tag.
Enjoy!


Saturday, October 4, 2014

Mask 17 - Hibiscus


New Mask!  This one I made using a hibiscus flower brush in multiple size and then added blending elements to it vary how it shows through.  Enjoy!


Wednesday, September 24, 2014

Mask 16 - Criss Cross


Another new mask.  I was in the mood to do something a bit different and thought this ended up looking kind of cool.  Enjoy!

Sunday, August 3, 2014

CT Tag Show off for PTU Poser Marian and matching Kit

CT Tags showoff for Designs by Norella's PTU Poser Marian and matching scrap kit by Amy Marie!

CT Tags showoff for Designs by Norella's PTU Poser Marian and matching scrap kit by Amy Marie!

PTU Poser Marian available for purchase at Designs By Norella store:

Made to match PTU Kit "Marian" available for purchase at Amy Marie's store:


Bonus snaggable FB Cover!


Monday, July 21, 2014

Mask 15 - Retro Circles


I was working on a Disco theme tag and wanted a groovy background mask to use with it so I created this one.  Enjoy!


Sunday, July 13, 2014

New FTU Cover to match CT Tutorial Anna by English Rose Designs


New FTU FB Cover!  I made this to match the tag created using the tutorial for the tag below featuring Anna by English Rose Designs:
You can find a copy of the tutorial with all supplies and links needed here.
If you want to make your own tag design, you can purchase Anna from the English Rose Designs website here.

Saturday, July 5, 2014

Mask 14 - Circles


I wanted a mask that was more opaque so I used a circle brush to make this.  It can be used for tags where you want the background to be solid instead of semi-transparent.
This is an example of what I used in my tag to create a background.  Enjoy!

Saturday, June 28, 2014

Mask 13 - Cloudy


Just another cloud mask...I didn't like the way any of my current ones showed up in a tag I was making so I made this one...lol...Enjoy!


Thursday, June 12, 2014

Mask 12 - Flash


New FTU Mask.  I made this one for a tag I was working on and I love the way it combines with the paper. Enjoy!

Paper used in Mask is Paper 5 from the kit "Pussy Cat Dreams" by Bibi's Collection.  Kit is available here.

Saturday, May 31, 2014

Mask 11 - Blurry


New mask created to use for a tag I was working on.  This mask works really well with effects applied to it after combining with paper.  Enjoy!


Saturday, May 24, 2014

Mask 10 - Flames


My newest mask.  This one was made using a flame brush. I like the wavy effect!


Mask 09 - Gumdrops


I wanted a candy themed mask for a tag I was making so I used a gumdrop cluster paintbrush to create this mask.  Hope you enjoy it!

Tuesday, May 20, 2014

Monday, May 19, 2014

Snaggable Facebook Cover - Match to Steampunk Lover CT Tag


FTU Snaggable Facebook Cover.  Match to the CT Tag tutorial for PTU Kit "Steampunk Lover" by Dance In The Rain.  Tutorial can be found here.

Sunday, May 18, 2014

New Snaggable FB Cover for Dark Queen by Michelle's Myths


New snaggable FB Cover which matches the CT Tag for Michelle's Myths PTU kit "Dark Queen".  You can find the tutorial to make the matching tag here.  Enjoy!

Thursday, May 15, 2014

Mask 07 - Torn


Another mask I created for a tag.  This one was made by using two different styles of fire brushes.  Enjoy!