Thursday, July 31, 2014

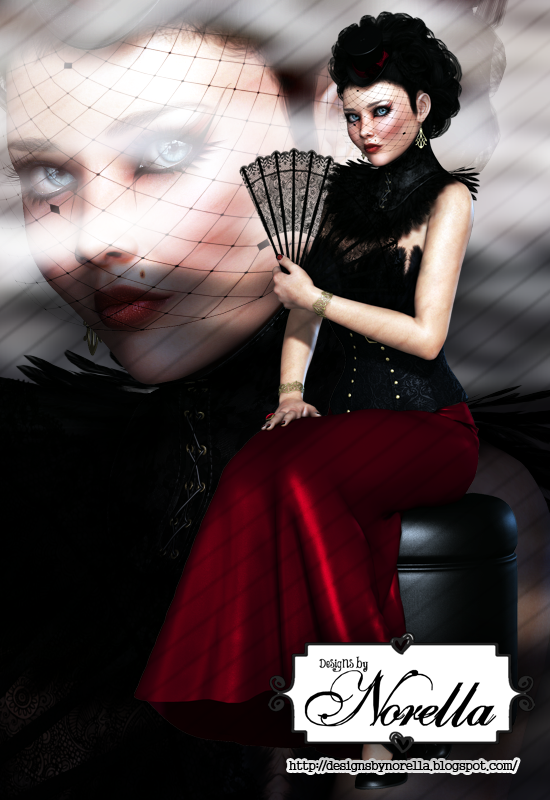
CT Tutorial for "Rainbow" PTU Kit by FwTags Creations

**This tutorial was written using Photoshop CC. I believe the instructions should work with various other versions, but they are not tested on any other version.  This tutorial is my own creation.  Any similarity to any other tutorial is not done purposely or knowingly (aside from the fact that the process is pretty similar in most tutorials).  If you do not know how to do some of the things I mention here (like mirroring an image, adding a drop shadow, resizing elements, etc.), check out my “Tips and Tricks” tutorial. **

Supplies:
PTU Tube – “Rainbow” by Danny Lee.  You can purchase the tube at Scraps N Company

PTU Kit- “Rainbow” by FwTags Creations.  Available at Scraps n Company.

FTU Mask - “Mask 04 - SkyHeart” available for download from my blog.


Abbreviations:
DS – Drop Shadow

Settings I use:
DS Settings - Blend Mode set to Multiply, Opacity set to 75%, Angle set to 120 degrees, Distance 5, Spread 0, Size 5

Ready…..Set….Tag!
Open Paper 1 in a new canvas.  Double click on the layer to unlock it.

Add the Mask to the canvas and resize if needed so it is the same size as the paper.  Then drag the mask layer below the paper layer.

With the mask layer selected, select all (Ctrl + A) and copy the entire canvas (Ctrl + C).  You will see dashed lines surround the canvas. 

Click on the paper layer to activate it, then turn on quick mask (Press the Q key on your keyboard).  The dashed lines will disappear and that is ok.  Next Paste onto the paper (Ctrl + V) and turn your Quick Mask off (Q again). 

You will now see a dotted outline of the mask on your paper.  Press the button on the bottom of layers side bar that is a rectangle with a circle cut out of it.  The mask will now show. 

Right click on the paper layer and select Convert to Smart Image.  This releases just the mask.  The background layer of the mask will become invisible on its own. 

Open a new canvas (Ctrl +N) 700 x 700, transparent background.  This will be referred to as the working canvas in my directions when switching between canvases.

Add the combined mask from above and resize to the fit the canvas.  Make sure this becomes your bottom layer.  It will stay the bottom layer of the tag.

Add Frame 1 to the canvas.  Resize to fit the width of the canvas and center it on your mask.  Add DS.

Add Paper 4 to the canvas. Resize to fit over the opening in the frame in the element above.  Move the paper layer below the frame.  Use the eraser tool to erase any overhang of the paper showing outside of the frame.

Add the Close Up layer of the tube.  Resize to fit from the bottom of the frame to the head extending outside of the frame.  Duplicate the layer and move the duplicate layer above the frame layer.  Select both layers of the close up and then right click on one of them.  Select “Link Layers”.  Add DS to the bottom close up layer. Right click on the layer and select “Create Clipping Mask”.  This will trim the close up to fit only on the paper.  Select the close up layer above the frame.  Use the eraser tool to erase any portion of the layer that is overhanging the frame where you don’t want it to.

Add Element 13 to the canvas and resize to your liking.  Add DS. Make sure it is above the frame layer.  Position on the left side of the canvas at the bottom.

Add Element 35 to the canvas and resize to your liking.  Add DS.  Position on the right side of the canvas at the bottom.

Add Element 38 to the canvas and resize to fit between the flower and the dog.  Add DS.

Voila!  The focal point of your tag is now created.

Now decorate your tag with any of the gloriously girly elements from the kit.  Resize the elements as you add them to fit the proportions of your tag.  Experiment with rotating them and mirroring them for more variety.  In addition duplicate elements and use multiple times to fill in holes and add more pizzazz.  In this tutorial to indicate when I used more than one of the same element I will add (X#) by the name to indicate how many versions of the element I used. 

Here are all the additional elements I used from the bottom layers.
  • Element 9 (x2)
  • Element 11
  • Element 7
  • Element 50 (x2)
  • Element 15 (x2)
  • Element 17 (x2)
  • Element 16
  • Element 29
  • Element 10
  • Element 12 (x2)
  • Element 42
  • Element 27 (x3)
  • Element 44
  • Element 47
  • Element 48
  • Element 36
  • Element 43

Add your license and copyright info to the tag.

Add name and any other text of choice.

Save as PNG and go share with all your friends!


Thank you for trying my tut! I’d love to see how your tags turn out so if you like what you made, please post a copy here or show me on Facebook!
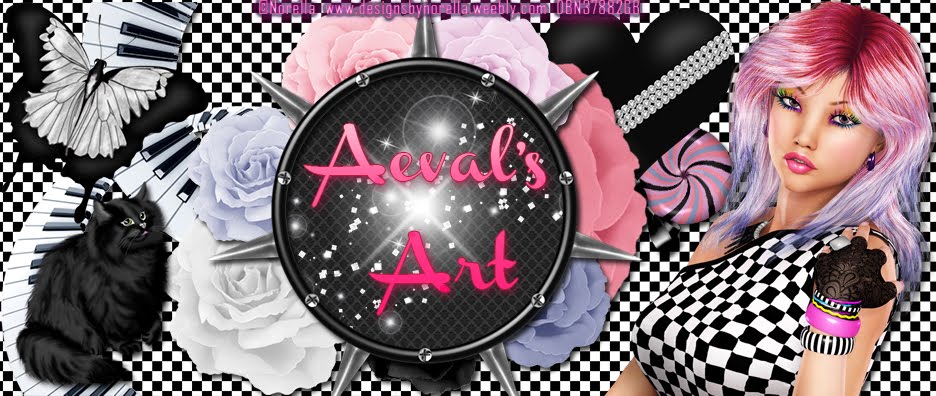
CT Tutorial for PTU Tube pack "Kelly & Kiara" by Ishika Chowdhury


**This tutorial was written using Photoshop CC. I believe the instructions should work with various other versions, but they are not tested on any other version.  This tutorial is my own creation.  Any similarity to any other tutorial is not done purposely or knowingly (aside from the fact that the process is pretty similar in most tutorials).  If you do not know how to do some of the things I mention here (like mirroring an image, adding a drop shadow, resizing elements, etc.), check out my “Tips and Tricks” tutorial. **

Supplies:
PTU Tubes – “Kelly & Kiara” by Ishika Chowdhury.  This tube combo pack is available exclusively at Mystical Scraps.

PTU Kit – “Rainbow” by FwTags Creations.  You can purchase this bright, girly kit exclusively at Scraps N Company.

Abbreviations:
DS – Drop Shadow

Settings I use:
DS Settings - Blend Mode set to Multiply, Opacity set to 75%, Angle set to 120 degrees, Distance 5, Spread 0, Size 5

Ready…..Set….Tag!
Open a new canvas (Ctrl +N) 700 x 700, transparent background.  This will be referred to as the working canvas in my directions when switching between canvases.

Add Paper 2 to the canvas and resize to fit the entire canvas.

Add Paper 4 to the canvas and resize to fit the entire canvas.  Use the Rectangular Marquee Tool and draw a rectangle around the bottom quarter or so of the canvas.  Right click on the paper layer and select “Rasterize layer”, then press the delete key with the layer selected.  This will create a small area displaying the first paper.  This creates separation to form a wall and floor effect.

Add Element 59 to the canvas and resize to fit so it reaches from the “floor” to the top of the canvas.  Duplicate the element and then flip it horizontally (Edit > Transform > Flip Horizontal).  Position the original layer on the right side of the canvas and then move the duplicate over to the left side.

Add Element 35 to the canvas and resize to fit proportionally.  Position the dog in front of the middle of the screens.  Add DS.

Add Element 1 to the canvas and resize to your liking.  Position on the left side of the canvas in front of the screen.

Add tube “Kelly” to the canvas.  Resize to fit the canvas.  Position her slightly in front of the box to the left of the dog.  Add DS.

Add tube “Kiara” to the canvas.    Resize to fit proportionally and position her to look as though she is sitting on the floor in front of the screen slightly in front of the dog.

Add Element 6 to the canvas.  Resize to be large enough to hold the name you want to put on the tag.

Voila!  The focal point of your tag is now created.

Now decorate your tag with any of the beautiful girly elements from the kit.  Resize the elements as you add them to fit the proportions of your tag.  Experiment with rotating them and mirroring them for more variety.  In addition duplicate elements and use multiple times to fill in holes and add more pizzazz.  In this tutorial to indicate when I used more than one of the same element I will add (X#) by the name to indicate how many versions of the element I used. 

Here are all the additional elements I used from the bottom layers.
  • Element 50
  • Element 36
  • Element 11
  • Element 40
  • Element 13
  • Element 14
  • Element 55
  • Element 60
  • Element 62
  • Element 2
  • Element 34
  • Element 52
  • Element 37
  • Element 4
  • Element 53
  • Element 24
  • Element 16
  • Element 20

Add your license and copyright info to the tag.

Add name and any other text of choice.

Save as PNG and go share with all your friends!

Thank you for trying my tut! I’d love to see how your tags turn out so if you like what you made, please post a copy here or show me on Facebook!

Monday, July 28, 2014

Laura's Love by Misty Mayhem Scraps for Berry Applicious CT

CT Tags for Berry Applicious featuring the beautiful kit "Laura's Love" by Misty Mayhem Scraps!


This gorgeous PTU tagger size kit is a beautiful girly kit.  Kit includes 50 elements and 10 papers.  Available for sale at Berry Applicious!


Sunday, July 27, 2014

CT Tutorial for Summer6 by English Rose Designs

**This tutorial was written using Photoshop CC. I believe the instructions should work with various other versions, but they are not tested on any other version.  This tutorial is my own creation.  Any similarity to any other tutorial is not done purposely or knowingly (aside from the fact that the process is pretty similar in most tutorials).  If you do not know how to do some of the things I mention here (like mirroring an image, adding a drop shadow, resizing elements, etc.), check out my “Tips and Tricks” tutorial. **

Supplies:
PTU Poser – “Summer6” by English Rose Designs.  You can purchase this elegant beauty at her store, English Rose Designs.

FTU Kit- “Summer at the Shore” by Digicats (and Dogs).  You can download this kit on the Digicats (and Dogs) blog.

Abbreviations:
DS – Drop Shadow

Settings I use:
DS Settings - Blend Mode set to Multiply, Opacity set to 75%, Angle set to 120 degrees, Distance 5, Spread 0, Size 5

Ready…..Set….Tag!

Create your background mask:
Open a new canvas (Ctrl +N) 700 x 700, transparent background.  This will be referred to as the working canvas in my directions when switching between canvases.

Add Paper 12 to the canvas and resize to fit the canvas.

Add the Sand Dune element to the canvas.  Resize to fit the width of the canvas and position at the bottom of the canvas.

Add the Sea element to the canvas. Resize to fit the width of the canvas and position above the sand dune slightly overlapping.

Open the poser in another canvas.  Use the marquee tool and draw a rectangle around the upper portion of the poser.  Copy (Ctrl + C) the poser upper half and switch back to the working canvas.  Paste (Ctrl + V) the poser onto the canvas.  Resize to fit in the right side of the sky area.  Right click on the poser layer and select Blending Options.  Change the Blend Mode to the Hard Light.

Add the Volleyball Set to the canvas.  Resize to fit the width.  Position the set on the beach.  Add DS.

Add the reclining poser to the canvas.  Resize to fit the width.  Position in front of the net and add DS.

Add the reclined poser to the canvas and resize to fit the canvas.  Position at the bottom as the top layer.  Add DS.

Voila!  The focal point of your tag is now created.

Now decorate your tag with any of the beach themed elements from the kit.  Resize the elements as you add them to fit the proportions of your tag.  Experiment with rotating them and mirroring them for more variety.  In addition duplicate elements and use multiple times to fill in holes and add more pizzazz.  In this tutorial to indicate when I used more than one of the same element I will add (X#) by the name to indicate how many versions of the element I used. 

Here are all the additional elements I used from the bottom layers.
  • Sunshower
  • Sparkles
  • Sun
  • Lighthouse
  • Kite
  • Seashell02
  • Seashell01
  • Seashell03
  • Starfish
  • Beach Umbrella
  • Clam Shell
  • Flower02
  • Flower01
  • Conch Shell
  • Flower05
  • Flower04
  • Sunglasses
  • Summer Drink

Add your license and copyright info to the tag.

Add name and any other text of choice.

Save as PNG and go share with all your friends!


Thank you for trying my tut! I’d love to see how your tags turn out so if you like what you made, please post a copy here or show me on Facebook!

CT Tutorial for Summer1 by English Rose Designs

**This tutorial was written using Photoshop CC. I believe the instructions should work with various other versions, but they are not tested on any other version.  This tutorial is my own creation.  Any similarity to any other tutorial is not done purposely or knowingly (aside from the fact that the process is pretty similar in most tutorials).  If you do not know how to do some of the things I mention here (like mirroring an image, adding a drop shadow, resizing elements, etc.), check out my “Tips and Tricks” tutorial. **

Supplies:
PTU Poser – “Summer1” by English Rose Designs.  You can purchase this elegant beauty at her store, English Rose Designs.

PTU Kit- “Summer Bright” by Drama Bomb Designs.  You can purchase this kit at Spazzd Art.

FTU Mask – “Mask 03 - Jagged” by Aeval Amore.  You can download the mask on my blog, Aeval’s Art.

Abbreviations:
DS – Drop Shadow

Settings I use:
DS Settings - Blend Mode set to Multiply, Opacity set to 75%, Angle set to 120 degrees, Distance 5, Spread 0, Size 5

Ready…..Set….Tag!

Create your background mask:
Open Paper 12 in PS.  Double click on the layer to unlock it.

Add the Mask to the canvas and resize if needed so it is the same size as the paper.  Then drag the mask layer below the paper layer.

With the mask layer selected, select all (Ctrl + A) and copy the entire canvas (Ctrl + C).  You will see dashed lines surround the canvas. 

Click on the paper layer to activate it, then turn on quick mask (Press the Q key on your keyboard).  The dashed lines will disappear and that is ok.  Next Paste onto the paper (Ctrl + V) and turn your Quick Mask off (Q again). 

You will now see a dotted outline of the mask on your paper.  Press the button on the bottom of layers side bar that is a rectangle with a circle cut out of it.  The mask will now show. 

Right click on the paper layer and select Convert to Smart Image.  This releases just the mask.  The background layer of the mask will become invisible on its own. 

Open a new canvas (Ctrl +N) 700 x 700, transparent background.  This will be referred to as the working canvas in my directions when switching between canvases.

Add the mask you made above to the canvas and resize to fit the canvas.

Add Element 65 and resize to fit on the canvas.  Position so it appears that the tree is on the beach on the left side.  Add DS.  Duplicate the layer and move the duplicate layer over to the right side of the beach.

Add Element  85 to the canvas and resize to fit the width of the canvas.  Position so it is centered in front of the trees.

Open the poser in another canvas.  Use the marquee tool and draw a rectangle around the head of the poser.  Copy (Ctrl + C) the poser head and switch back to the working canvas.  Paste (Ctrl + V) the poser head onto the canvas.  Resize to fit in the left area of the heart.  Use the same method to copy another view of the poser’s head and paste it to fit in the right side of the heart.

Add the reclined poser to the canvas and resize to fit the canvas.  Position at the bottom as the top layer.  Add DS.

Voila!  The focal point of your tag is now created.

Now decorate your tag with any of the beach themed elements from the kit.  Resize the elements as you add them to fit the proportions of your tag.  Experiment with rotating them and mirroring them for more variety.  In addition duplicate elements and use multiple times to fill in holes and add more pizzazz.  In this tutorial to indicate when I used more than one of the same element I will add (X#) by the name to indicate how many versions of the element I used. 

Here are all the additional elements I used from the bottom layers.
  • Element 79
  • Element 81
  • Element 67
  • Element 56
  • Element 61
  • Element 73
  • Element 82 (x3)
  • Element 105
  • Element 78
  • Element 77
  • Element 76
  • Element 75
  • Element 86
  • Element 100
  • Element 94
  • Element 92
  • Element 90
  • Element 87

Add your license and copyright info to the tag.

Add name and any other text of choice.

Save as PNG and go share with all your friends!


Thank you for trying my tut! I’d love to see how your tags turn out so if you like what you made, please post a copy here or show me on Facebook!

Saturday, July 26, 2014

CT Tutorial for Summer9 by English Rose Designs

**This tutorial was written using Photoshop CC. I believe the instructions should work with various other versions, but they are not tested on any other version.  This tutorial is my own creation.  Any similarity to any other tutorial is not done purposely or knowingly (aside from the fact that the process is pretty similar in most tutorials).  If you do not know how to do some of the things I mention here (like mirroring an image, adding a drop shadow, resizing elements, etc.), check out my “Tips and Tricks” tutorial. **

Supplies:
PTU Poser – “Summer9” by English Rose Designs.  You can purchase this elegant beauty at her store, English Rose Designs.

FTU Kit- “Hibiscus” by Gimptastic Scraps.  You can download this kit at Amy & Leah's Gimptastic Tuts blog.

FTU Mask – “Mask 08 - Focus” by Aeval Amore.  You can download the mask on my blog, Aeval’s Art.

Abbreviations:
DS – Drop Shadow

Settings I use:
DS Settings - Blend Mode set to Multiply, Opacity set to 75%, Angle set to 120 degrees, Distance 5, Spread 0, Size 5

Ready…..Set….Tag!

Create your background mask:
Open Paper 6 in PS.  Double click on the layer to unlock it.

Add the Mask to the canvas and resize if needed so it is the same size as the paper.  Then drag the mask layer below the paper layer.

With the mask layer selected, select all (Ctrl + A) and copy the entire canvas (Ctrl + C).  You will see dashed lines surround the canvas. 

Click on the paper layer to activate it, then turn on quick mask (Press the Q key on your keyboard).  The dashed lines will disappear and that is ok.  Next Paste onto the paper (Ctrl + V) and turn your Quick Mask off (Q again). 

You will now see a dotted outline of the mask on your paper.  Press the button on the bottom of layers side bar that is a rectangle with a circle cut out of it.  The mask will now show. 

Right click on the paper layer and select Convert to Smart Image.  This releases just the mask.  The background layer of the mask will become invisible on its own. 

Open a new canvas (Ctrl +N) 700 x 700, transparent background.  This will be referred to as the working canvas in my directions when switching between canvases.

Add the mask you made above to the canvas and resize to fit the canvas.

Add the Sand element to the canvas.  Resize to fit the width of the canvas.  Position at the bottom of the canvas overlapping the mask.

Add PalmTree element to the canvas.  Resize to your liking.  Move the element layer below the sand layer.  Add DS.  Position on the left side of the canvas.  Duplicate the tree and move the duplicate to the right side of the canvas.

Add the Wave element to the canvas.  Move element below the tree layers, resize and rotate the element so that the crest of the wave shows above the sand. Position on the left side of the canvas. Duplicate the element and use the eraser tool to erase the bottom half of the wave.  Move the remaining portion of the duplicate to the right side of the canvas so slightly less of the wave shows above the sand.

Open the poser in another canvas.  Use the marquee tool and draw a rectangle around the head of the poser.  Copy (Ctrl + C) the poser head and switch back to the working canvas.  Paste (Ctrl + V) the poser head onto the paper.  Resize to fit in the open area between the trees.  If necessary use the Eraser tool to erase any part of the surfboard area that you may have copied with the head.  Right click on the head layer and select Blending Options, change the Blend Mode to Pin Light.

Add the Branch Element the canvas and resize so it fits between the trees.  Make sure this is above the Sand element.  Add DS.

Add the full poser to the canvas and resize to fit the canvas.  Position on the left side in front of the tree.  Add DS.

Voila!  The focal point of your tag is now created.

Now decorate your tag with any of the beach themed elements from the kit.  Resize the elements as you add them to fit the proportions of your tag.  Experiment with rotating them and mirroring them for more variety.  In addition duplicate elements and use multiple times to fill in holes and add more pizzazz.  In this tutorial to indicate when I used more than one of the same element I will add (X#) by the name to indicate how many versions of the element I used. 

Here are all the additional elements I used from the bottom layers.
  • Coconut
  • Drum
  • LemonSlice
  • Parrot
  • Flower1
  • Flower2
  • Flower4
  • Flower5
  • Pineapple
  • Shell2
  • Flower8
  • Butterfly
  • Bananas
  • Turtle
  • TropicalFruit

 Add your license and copyright info to the tag.

Add name and any other text of choice.

Save as PNG and go share with all your friends!

Thank you for trying my tut! I’d love to see how your tags turn out so if you like what you made, please post a copy here or show me on Facebook!


Friday, July 25, 2014

CT Tags #3 & 4 for Lilith and Amy Marie's matching kit!


CT Tags showoff for Designs by Norella's PTU Poser Lilith and matching scrap kit by Amy Marie!

PTU Poser Lilith available for purchase at Designs By Norella store:


Made to match PTU Kit "Lilith" available for purchase at Amy Marie's store:

Thursday, July 24, 2014

CT Tags for Lilith and matching kit


CT Tags showoff for Designs by Norella's PTU Poser Lilith and matching scrap kit by Amy Marie!


PTU Poser Lilith available for purchase at Designs By Norella store:


Made to match PTU Kit "Lilith" available for purchase at Amy Marie's store:


Monday, July 21, 2014

CT Tutorial for "70's Night" by Kai Kreations

**This tutorial was written using Photoshop CC. I believe the instructions should work with various other versions, but they are not tested on any other version.  This tutorial is my own creation.  Any similarity to any other tutorial is not done purposely or knowingly (aside from the fact that the process is pretty similar in most tutorials).  If you do not know how to do some of the things I mention here (like mirroring an image, adding a drop shadow, resizing elements, etc.), check out my “Tips and Tricks” tutorial. **

Supplies:
PTU Tube – “Fan Girl” by Trinita.  This poser was a pre-paid exclusive at  PicsForDesigns.com.

PTU Kit – “70’s Night” by Kai Kreations.  You can find this groovy disco kit for sale exclusively at Berry Applicious.

FTU Mask  – “Mask 15 – Retro Circles” available for download from my blog.


Abbreviations:
DS – Drop Shadow

Settings I use:
DS Settings - Blend Mode set to Multiply, Opacity set to 75%, Angle set to 120 degrees, Distance 5, Spread 0, Size 5

Ready…..Set….Tag!
Open the paper of your choice in PS.  Double click on the layer to unlock it.

Add the Mask to the canvas and resize if needed so it is the same size as the paper.  Then drag the mask layer below the paper layer.

With the mask layer selected, select all (Ctrl + A) and copy the entire canvas (Ctrl + C).  You will see dashed lines surround the canvas. 

Click on the paper layer to activate it, then turn on quick mask (Press the Q key on your keyboard).  The dashed lines will disappear and that is ok.  Next Paste onto the paper (Ctrl + V) and turn your Quick Mask off (Q again). 

You will now see a dotted outline of the mask on your paper.  Press the button on the bottom of layers side bar that is a rectangle with a circle cut out of it.  The mask will now show. 

Right click on the paper layer and select Convert to Smart Image.  This releases just the mask.  The background layer of the mask will become invisible on its own. 

Open a new canvas (Ctrl +N) 700 x 700, transparent background.  This will be referred to as the working canvas in my directions when switching between canvases.

Add the mask you made above to the canvas and resize to fit the canvas.

Add Frame 2 to the canvas and resize to fit the canvas.  Add DS.

Add Paper 1 to the canvas.  Resize to fit over the opening in the frame in the element above.  Move the paper layer below the frame.  Use the eraser tool to erase any overhang of the paper showing outside of the frame.

Add the tube to your canvas underneath the frame layer.  Resize her so her head is above the top of the frame and the bottom of the tube is hidden behind the frame.  Add DS.  Duplicate the layer.  Move the duplicate layer on top of the frame layer.  Select both layers and right click on one of them, select Link Layers to lock them together.  Right click on the duplicate top layer and clear the layer style.  Then click on the Filter menu and apply the Sharpen filter to the top layer.  Use the eraser tool to clean up any overhand on the tube layers if they are hanging out of the frame on the bottom layer or even on the bottom part of the frame on the top layer.

Add Element 60 to the canvas.  Resize to fit the width of the frame and position at the bottom of the frame slightly overlapping the frame and girl.  Add DS.

Voila!  The focal point of your tag is now created.

Now decorate your tag with any of the disco themed elements from the kit.  Resize the elements as you add them to fit the proportions of your tag.  Experiment with rotating them and mirroring them for more variety.  In addition duplicate elements and use multiple times to fill in holes and add more pizzazz.  In this tutorial to indicate when I used more than one of the same element I will add (X#) by the name to indicate how many versions of the element I used. 

Here are all the additional elements I used from the bottom layers.
  • Element 70 (x4)
  • Element 12
  • Element 57 (x2)
  • Element 29
  • Element 13
  • Element 50
  • Element 23
  • Element 25
  • Element 58
  • Element 4 (x2)

Add your license and copyright info to the tag.

Add name and any other text of choice.

Save as PNG and go share with all your friends!


Thank you for trying my tut! I’d love to see how your tags turn out so if you like what you made, please post a copy here or show me on Facebook!

Mask 15 - Retro Circles


I was working on a Disco theme tag and wanted a groovy background mask to use with it so I created this one.  Enjoy!


Sunday, July 20, 2014

CT Tutorial for Jacinta Dreams by FwTags Creations

**This tutorial was written using Photoshop CC. I believe the instructions should work with various other versions, but they are not tested on any other version.  This tutorial is my own creation.  Any similarity to any other tutorial is not done purposely or knowingly (aside from the fact that the process is pretty similar in most tutorials).  If you do not know how to do some of the things I mention here (like mirroring an image, adding a drop shadow, resizing elements, etc.), check out my “Tips and Tricks” tutorial. **

Supplies:
PTU Poser – “Liza” by Designs by Norella.  You can purchase the tube at the Designs by Norella store

PTU Kit- “Jacinta Dreams” by FwTags Creations is exclusively available at BerryApplicious Store.

FTU Mask - “Mask 10 - Flames” available for download from my blog.

Abbreviations:
DS – Drop Shadow

Settings I use:
DS Settings - Blend Mode set to Multiply, Opacity set to 75%, Angle set to 120 degrees, Distance 5, Spread 0, Size 5

Ready…..Set….Tag!
Open Paper 2 in a new canvas.  Double click on the layer to unlock it.

Add the Mask to the canvas and resize if needed so it is the same size as the paper.  Then drag the mask layer below the paper layer.

With the mask layer selected, select all (Ctrl + A) and copy the entire canvas (Ctrl + C).  You will see dashed lines surround the canvas. 

Click on the paper layer to activate it, then turn on quick mask (Press the Q key on your keyboard).  The dashed lines will disappear and that is ok.  Next Paste onto the paper (Ctrl + V) and turn your Quick Mask off (Q again). 

You will now see a dotted outline of the mask on your paper.  Press the button on the bottom of layers side bar that is a rectangle with a circle cut out of it.  The mask will now show. 

Right click on the paper layer and select Convert to Smart Image.  This releases just the mask.  The background layer of the mask will become invisible on its own. 

Open a new canvas (Ctrl +N) 700 x 700, transparent background.  This will be referred to as the working canvas in my directions when switching between canvases.

Add the combined mask from above and resize to the fit the canvas.  Make sure this becomes your bottom layer.  It will stay the bottom layer of the tag.

Add Element 6 to the canvas.  Resize to fit the width of the canvas.  Position at the bottom.  Add DS.

Add Element 52 to the canvas.  Resize to fit the canvas.  Position in the center  so that the curtain ends up pooled on top of the rug.  Add DS.

Add Element 8.  Resize to your liking and position on the left side of the canvas above the rug.  Add DS.

Add Element 51.  Resize to your liking and position on the right side of the canvas across from the chair.  Add DS.

Click on the curtain layer to select it.  Add Element 49 and resize to fit the width of the curtain.  This will be where the name for the tag goes later.  Position it so it is slightly behind the fireplace.  Add DS.

Add your poser.  Resize her so she fits on the canvas and position her so she appears to be sitting on the rug in front of the chair.  Add DS.    

Click on the Mask layer to make it the active layer.  Add Paper 1 to the canvas.  Resize it so it fits the width of the canvas.  Using the Rectangular Marquee Tool draw a rectangle from the top of the paper to right above the bottom of the fireplace.  Right click on the paper layer and select Rasterize.  Press the delete button.  This will delete all the paper except a small section at the bottom making it look as though it is a floor.

Voila!  The focal point of your tag is now created.

Now decorate your tag with any of the glamorous elements from the kit.  Resize the elements as you add them to fit the proportions of your tag.  Experiment with rotating them and mirroring them for more variety.  In addition duplicate elements and use multiple times to fill in holes and add more pizzazz.  In this tutorial to indicate when I used more than one of the same element I will add (X#) by the name to indicate how many versions of the element I used. 

Here are all the elements I used from the bottom layers.
  • Element 57 (x2)
  • Element 56
  • Element 63
  • Element 62
  • Element 58
  • Element 43
  • Element 40
 Add your license and copyright info to the tag.

Add name and any other text of choice.

Save as PNG and go share with all your friends!

Thank you for trying my tut! I’d love to see how your tags turn out so if you like what you made, please post a copy here or show me on Facebook!

Saturday, July 19, 2014

CT Tutorial for "Bad Girl" by Crystal's Creations


**This tutorial was written using Photoshop CC. I believe the instructions should work with various other versions, but they are not tested on any other version.  This tutorial is my own creation.  Any similarity to any other tutorial is not done purposely or knowingly (aside from the fact that the process is pretty similar in most tutorials).  If you do not know how to do some of the things I mention here (like mirroring an image, adding a drop shadow, resizing elements, etc.), check out my “Tips and Tricks” tutorial. **

Supplies:
PTU Tube – “Jennis” by Designs by Norella.  This tube is available for purchase at Designs by Norella store.

PTU Kit – “Bad Girl” by Crystals Creations.  You can find this badass kit for sale at D'zines From The Heart.

FTU Mask – “Mask 06 – Fireball” by Aeval Amore.  You can download this FTU mask from my blog.

Abbreviations:
DS – Drop Shadow

Settings I use:
DS Settings - Blend Mode set to Multiply, Opacity set to 75%, Angle set to 120 degrees, Distance 5, Spread 0, Size 5

Ready…..Set….Tag!
Open paper 6 in a new canvas.  Double click on the layer to unlock it.

Add the Mask to the canvas and resize if needed so it is the same size as the paper.  Then drag the mask layer below the paper layer.

With the mask layer selected, select all (Ctrl + A) and copy the entire canvas (Ctrl + C).  You will see dashed lines surround the canvas. 

Click on the paper layer to activate it, then turn on quick mask (Press the Q key on your keyboard).  The dashed lines will disappear and that is ok.  Next Paste onto the paper (Ctrl + V) and turn your Quick Mask off (Q again). 

You will now see a dotted outline of the mask on your paper.  Press the button on the bottom of layers side bar that is a rectangle with a circle cut out of it.  The mask will now show. 

Right click on the paper layer and select Convert to Smart Image.  This releases just the mask.

Open a new canvas (Ctrl +N) 700 x 700, transparent background.  This will be referred to as the working canvas in my directions when switching between canvases.

Add the paper/mask combination from above to the working canvas.  Resize to fit the canvas.

Add Element 23 to the canvas.  Resize to fit the width of the canvas and position in the upper portion of your canvas.  Add DS.

Add Paper 11 to the canvas and move the layer below the frame.  Resize the paper to fill the open portion of the left frame slot.

Open the psd file of your poser use the Rectangular Marquee Tool to draw a box around the head of the poser.  Copy (Ctrl + C) the selection and return to your working canvas.

On your working canvas make sure the Paper 11 layer is selected then paste (Ctrl + V) the copied selection.  Resize the selection so that poser’s head fits to your satisfaction in frame.  If you want to showcase just part of the head like I did, resize and position the image so whatever you want to highlight is in the frame.  Right click on the layer and select create clipping mask.  This will hide everything outside of what is on the Paper 11 layer.  This is a trick I use a lot when I don’t want to use the eraser to customize what shows in a frame.

Add Paper 7 to the canvas.  Resize the paper to fill the center open slot of the frame.  This is where you can put the name on your tag when you are done.

Add Paper 6 to the canvas.  Resize the paper to fill the right open slot of the frame. 

Open the psd file of your poser use the Rectangular Marquee Tool to draw a box around the “Inked” print on the shirt of the poser.  Copy (Ctrl + C) the selection and return to your working canvas.

On your working canvas make sure the Paper 6 layer is selected then paste (Ctrl + V) the copied selection.  Resize the selection so that shirt layer shows to your satisfaction in frame.  Right click on the layer and select create clipping mask. 

Click on the frame layer to make it the active layer, then add the full poser to your canvas.  Resize and position between the first and center slots of the frame.  Add DS.

Add Element 1 to the canvas.  Resize to fit the width of the canvas.  Position the element below the frame so that it slightly overlaps it.  Move the layer below the poser layer. Add DS.

Add Element 10 to the canvas.  Resize to fit in the bottom section from the bottom of the tag to slightly overlapping the city skyline in the left corner.  Add DS.  Duplicate this layer three times.  Move each duplicate layer to the right to create a row of flames across the bottom.

Add Element 28 to the canvas.  Resize to your liking and position to the right of the poser at the bottom under the cityscape.  Add DS.

Add Element 24 to the canvas.  Resize to fit in the space between the element above and the right side of the canvas.  Add DS.

Voila!  The focal point of your tag is now created.

Now decorate your tag with any of the badass elements from the kit.  Resize the elements as you add them to fit the proportions of your tag.  Experiment with rotating them and mirroring them for more variety.  In addition duplicate elements and use multiple times to fill in holes and add more pizzazz.  In this tutorial to indicate when I used more than one of the same element I will add (X#) by the name to indicate how many versions of the element I used. 

Here are all the elements I used from the bottom layers.
  • Element 8
  • Element 5
  • Element 7
  • Element 2
  • Element 3
  • Element 22
  • Element 16
  • Element 15
Add your license and copyright info to the tag.

Add name and any other text of choice.

Save as PNG and go share with all your friends!

Thank you for trying my tut! I’d love to see how your tags turn out so if you like what you made, please post a copy here or show me on Facebook!